Once you have established an institutional profile, you can begin uploading individual items, or create a csv (comma-separated values) file of descriptive metadata that will allow you to do a bulk upload. The bulk upload is highly recommended and if you already create scripts to upload your content to an online repository, it may be fairly straightforward to manipulate an existing batch of records to fit the Historypin schema.
The bulk upload template and instructions are available online here.
If you do not already have lat/long measurements for pictures, you will have to do a manual search of the Historypin map and pin your images individually. As well, for images you wish to embed into Streetview, this must be done manually as well, which can take practice and skill.
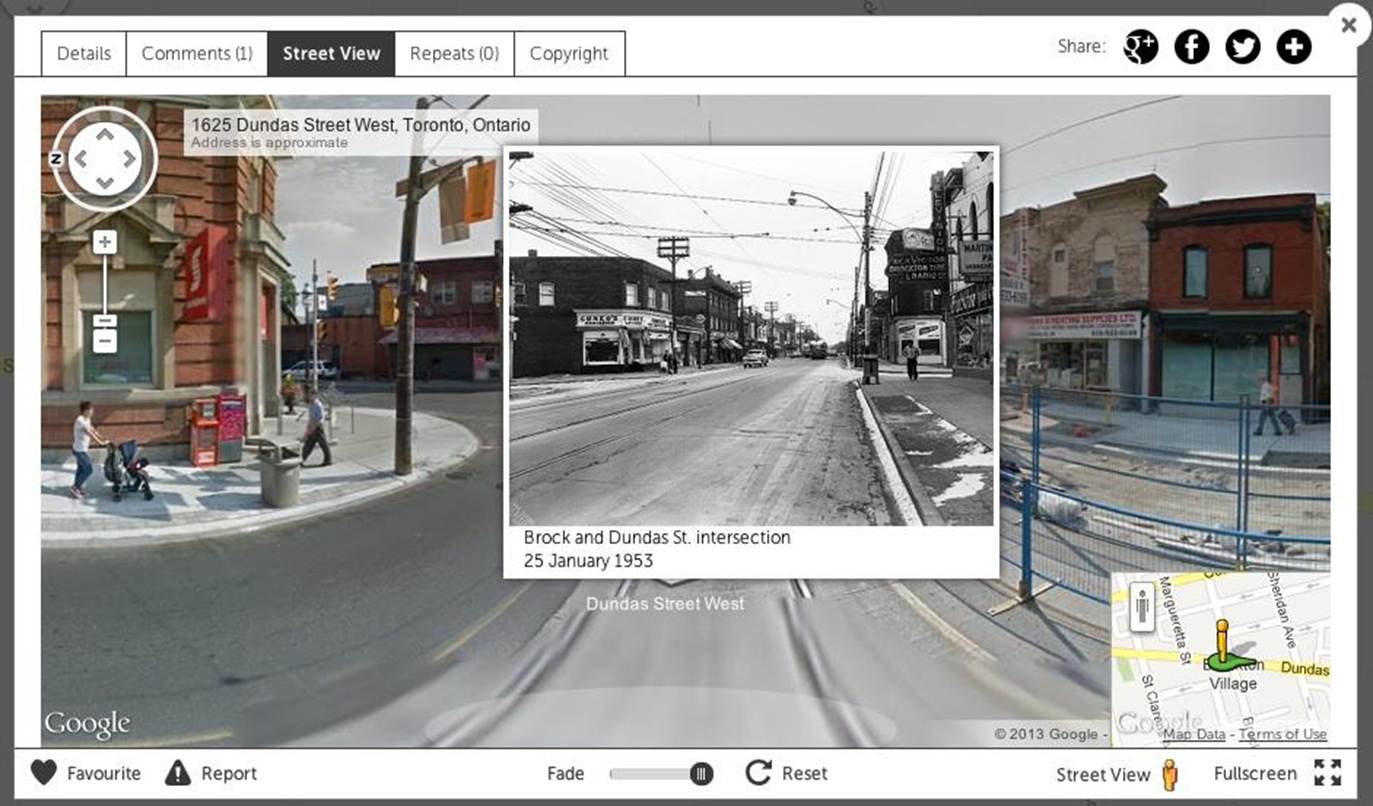
Not quite perfect, but this embedded view of Dundas Street from 1953 demonstrates continuity and change in Little Portugal in Toronto.
Other factors to consider
Two-stage contribution
Uploading content with lat/long measurements and then selectively embedding Streetview content is probably a more efficient use of time. Gauging public feedback will help determine which collections prove more popular or useful to the community. It may also identify engaged members of the public who will be willing to provide additional content as needed.
Volunteers / crowd sourcing
If you have the option, the Streetview embedding could probably be done by volunteers, student interns at your institution or engaged members of the public.
Does it all have to be loaded in?
Some images are not going to be strong enough visually to be useful to online audiences. They may also lack identifying features that will facilitate geo-location or embedding. Consider selective uploading of series of photographs to facilitate interaction and discovery, but consistently link back to online digital repository.
Features | Step by Step | Evaluation | Getting Started